
From 3TB to 100GB: A Cost-Saving Journey in Database Maintenance
In the era of ubiquitous cloud services and an increasingly growing PaaS and serverless-oriented approach, performance and resources seem to be becoming less and less important. After all, we can scale horizontally and vertically at any time, without worrying about potential performance challenges that the business may introduce.
However, there is also another side to the coin – rising costs. While it can be argued that in many situations it is simply cheaper to add another instance of the service than to engage a developer who will work tirelessly to diagnose and optimize performance problems, the problem will persist and intensify as the business and its requirements grow.
A similar situation arises with databases. We often store huge amounts of data for auditing or historical purposes. While the cost of maintaining such databases is negligible at a small scale, over time it can become a notable burden on our budget.
I wanted to talk about such a case and how we managed to reduce the cost of maintaining a database nearly 30-fold.
The problem #
As the amount of data grows, the need for scaling arises. In the case of Azure services, scaling also has its limitations. It is not always possible to infinitely increase the available disk space without scaling other resources (CPU, RAM, I/O). In our case, this limit became apparent when we exceeded 1TB of data. Our database was based on the vCore model, where we used 4 vCores.
Unfortunately, this number of vCores limited the available disk space to 1TB. Due to the increase in the number of users and the demand for disk space, we needed more resources. We continued to scale up, adding not only more disk resources but also computational resources (I will mention that at this point we reached a scale of 3TB of data, which requires at least 12 vCores). At some point, the cost of maintaining the database amounted to several thousand euros. This prompted us to look for solutions.
Comparing the cost of storing substantial amounts of data within Azure SQL and Storage Account (especially blobs in the archive tier), we concluded that we could achieve significant cost reduction by archiving old/unused data and placing it in a cost-optimized container.
Monthly cost of storing 3TB of data #
| Azure SQL 12vCore 3TB | Storage Account Archive tier |
|---|---|
| $2,876.18 | $31.12 |
Analysis #
After some investigation, It turned out that significant part of data could be safely archived, which would certainly provide potential savings and eliminate the problem of an overgrown database. Most of this data was actually historical.
We implemented a solution that allows for much more scalable data archiving by asynchronously loading data into the warehouse. However, data from before the implementation of aforementioned solution were still generating considerable storage costs.
The idea seemed simple both in concept and execution. However, we immediately encountered several problems. Exporting such massive amounts of data is a time-consuming process and puts a heavy load on the database causing responsiveness issues.
Dealing with a production system, we could not reduce the reliability and availability of services. In addition, the export functionality offered by the Azure portal is limited to databases up to 200GB in size, which meant that we had to look for another solution.
Action plan #
Concept #
As it turned out, there are ways to export even huge databases. After some investigation,
we found the SQL Package tool.
It provides export option and is great for solving aforementioned problem. It is able to produce a bacpac
file that contains highly compressed content of the database.
The tool also allows you to restore data at any time using the import operation,
if there is ever a need to review it, for example for audit purposes.
The next step is to copy the file to the container in the Storage Account using the AzCopy tool and ensure that it is stored in the ARCHIVE tier, what will massively reduce the costs of maintaining it.
The final stage is to delete unnecessary data from the database, then SHRINK it, what will reduce database resources.
Script and tools #
To export and archive the database, we used two tools provided by Microsoft: SQL Package and AzCopy.
After analyzing their documentation, we prepared the appropriate procedure taking into account performance and operation duration.
Infrastructure #
Due to the fact that the export and upload process to the Storage Account container with this amount of data may take a long time, we decided to set up a temporary VM with the accelerated networking option, which served us to execute all required scripts. It should be mentioned that the need to set up a dedicated virtual machine also arises from the fact that it must be located in an internal network, where it is also possible to connect to the machine that handles the database. Thanks to meeting this condition, it was possible to successfully connect to the database and perform the export operation.
The virtual machine turned out to be moderately priced, as all performed operations were not computationally demanding (both CPU and RAM usage were low), what allowed us to use a very resource-efficient machine. The only notable extension of its functionality is accelerated networking, as it must work with data transfer over the network and we needed good performance.
Testing #
Optimization #
Before we proceeded with the implementation in the production environment, we conducted a series of tests using test environments. They mainly involved running all the steps of the process using data packages of approximately 50GB and 200GB in size. We spent the majority of time testing and optimizing the use of the SQL Package tool.
Our goal was to shorten the export time and obtain an optimal size for the resulting file, so it would not generate excessive costs due to the need to store it. We tested several scenarios (mostly by manipulating the compression level parameter).
Compression in FAST mode showed an average of 10-20% faster export time than MAXIMUM, with the resulting file size varying within <10%.
Performance testing #
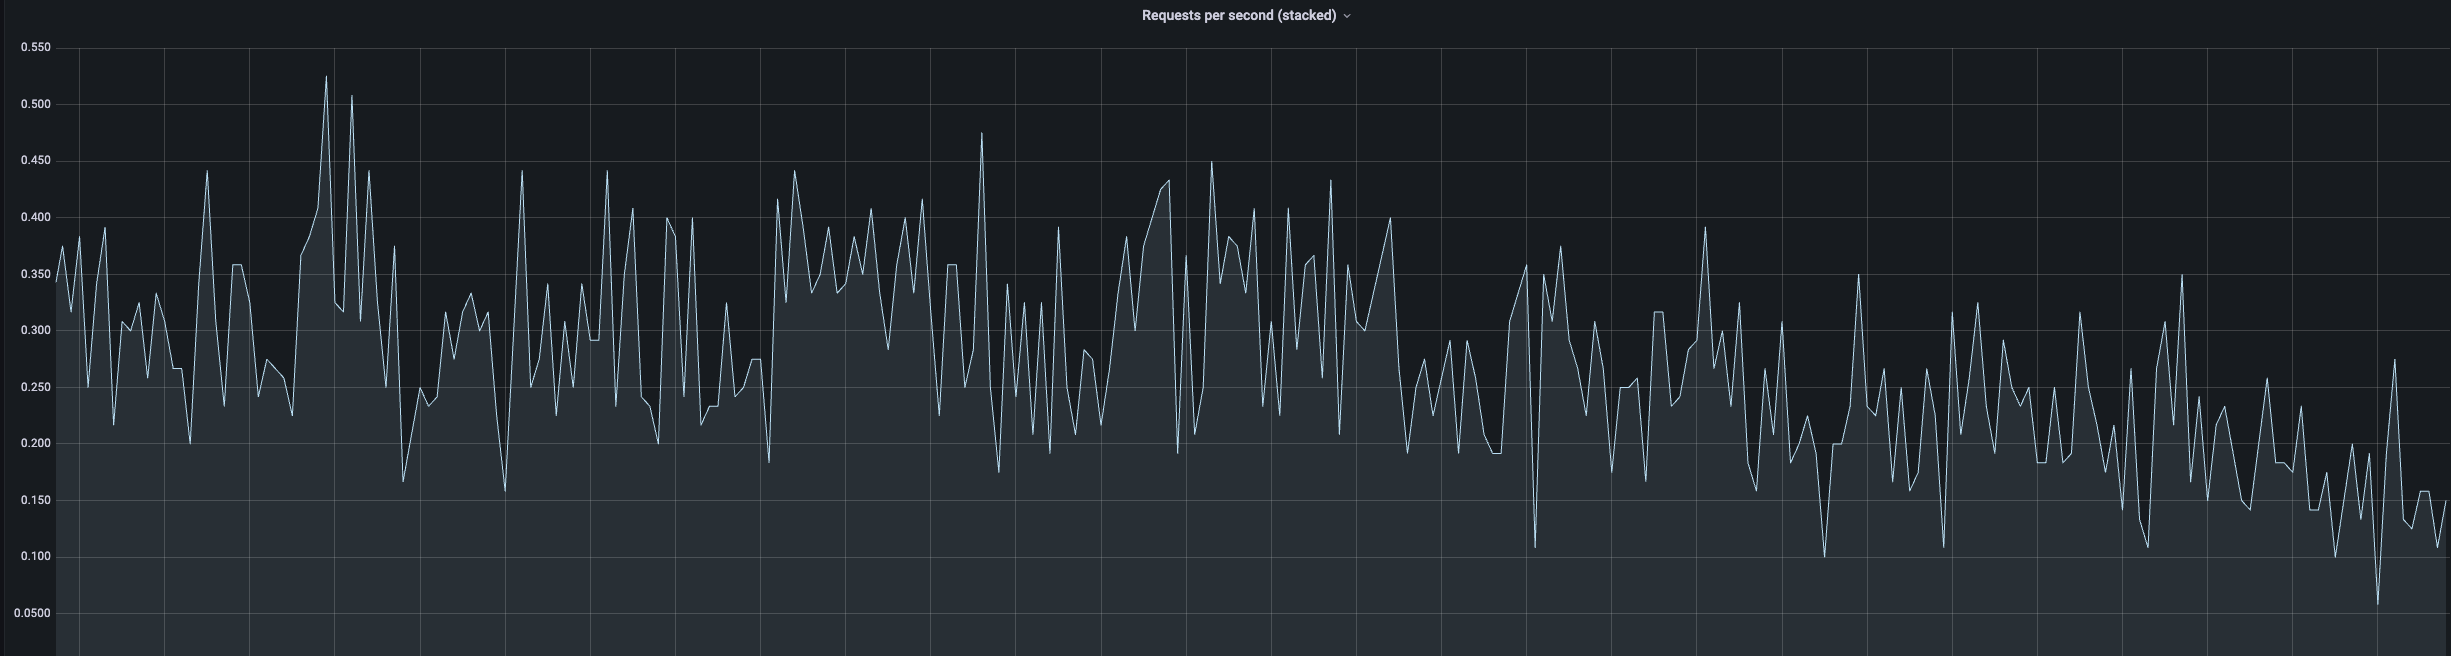
We also tested the load on the databases in each environment. Data IO and CPU load were tested using the test environment relying on DTU-based infrastructure utilising 100 DTU units.
Data IO
CPU
Notice, that the export operation primarily consumes IO resources.
Data Import #
Due to the possible need to reuse archived data, we had to make sure that the data we imported was suitable for re-import.
Initially, we attempted to import the data using the SQL Server Management Studio tool provided by Microsoft. Unfortunately, this attempt failed due to errors related to file reading during the import operation. We made an additional attempt to import the archive using the SQL Package tool, which, in addition to the export option, also provides import options.
Command
sqlpackage /Action:Import `
        /tsn:$ServerName `
        /tdn:$DatabaseName `
        /tu:$SqlAdminName `
        /tp:$SqlAdminPassword `
        /tec:true `
        /ttsc:false `
        /d:true `
        /sf:$SourceFile `
        /p:CommandTimeout=999 `
        /p:LongRunningCommandTimeout=0 `
        /p:DatabaseLockTimeout=-1 `
solved the problem.
Deployment #
Exporting the database using SQL Package tool #
The following script was executed, successfully extracting data from the database and creating the appropriate bacpac file.
As a result, we received a compressed file of around 100GB.
It is worth pointing out that data in the database occupied about 3TB, so compression was very efficient.
The whole process took several hours.
sqlpackage
    /Action:Export `
    /ssn:$ServerName `
    /sdn:$DatabaseName `
    /su:$SqlAdminName `
    /sp:$SqlAdminPassword `
    /sec:true `
    /stsc:false `
    /tf:$TargetFile `
    /p:CompressionOption=Fast `
    /p:CommandTimeout=999 `
    /p:LongRunningCommandTimeout=0 `
    /p:DatabaseLockTimeout=-1 `
    /p:TempDirectoryForTableData=$TempDirectory `
    /d:true `
    /df:$SqlLogs `
Many parameters of this operation were evaluated during trials on test environments. The particularly important ones are:
- CommandTimeout, LongRunningCommandTimeout, DatabaseLockTimeout - This set of parameters ensures that the connection is maintained throughout the entire duration of the export operation (assuming that it will be long-running).
- CompressionOption - The degree of data compression in the output file. Two variants were tested: FAST and MAXIMUM. FAST allowed us to shorten the export time by about 2 hours while showing only slightly lower data compression (in our case, the difference was around 10%).
/p:TableData="dbo.TestTable"
The parameter allows us to limit the data export only to the tables selected by us, what significantly shortens the overall operation time. It is also worth mentioning that it is possible to set the parameter multiple times.
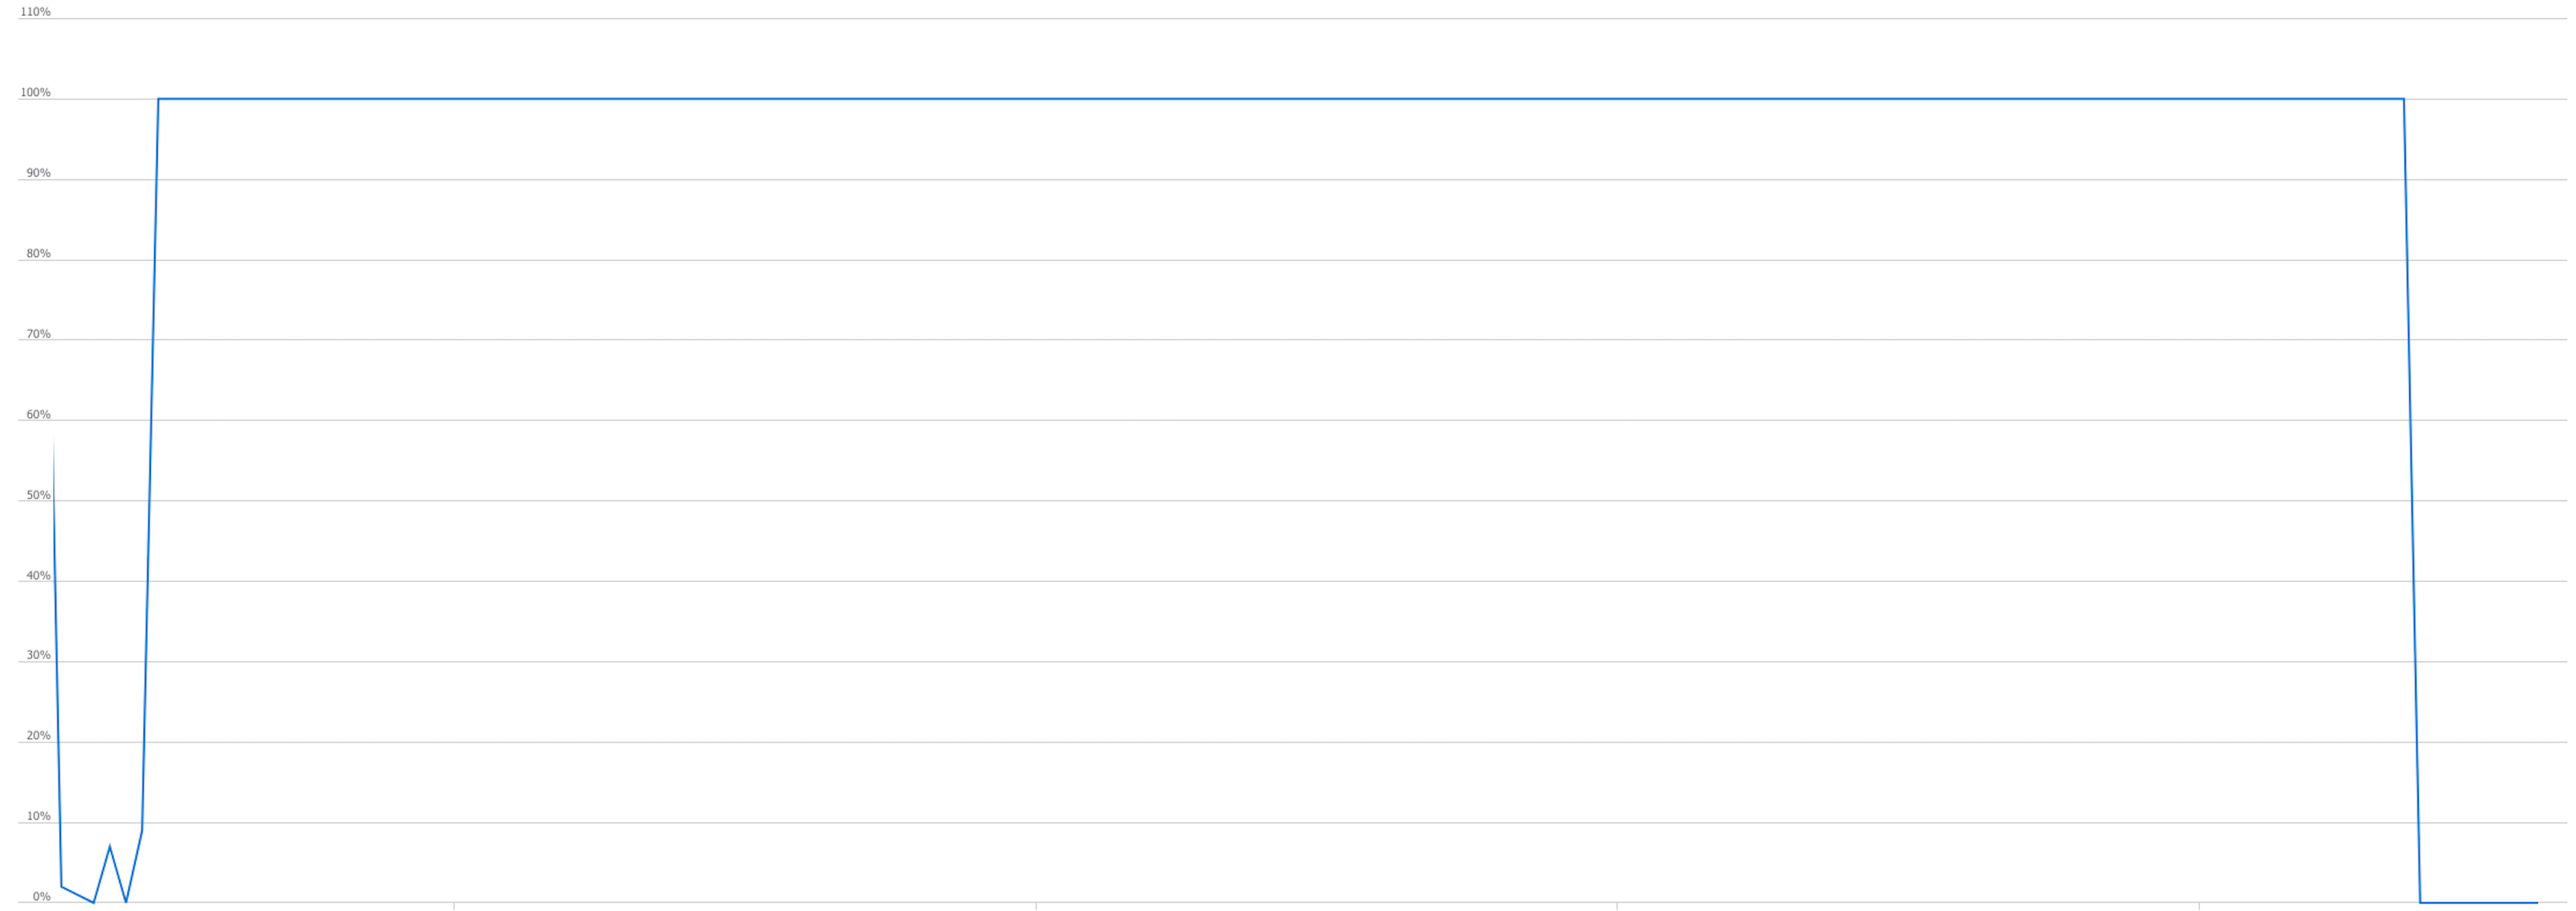
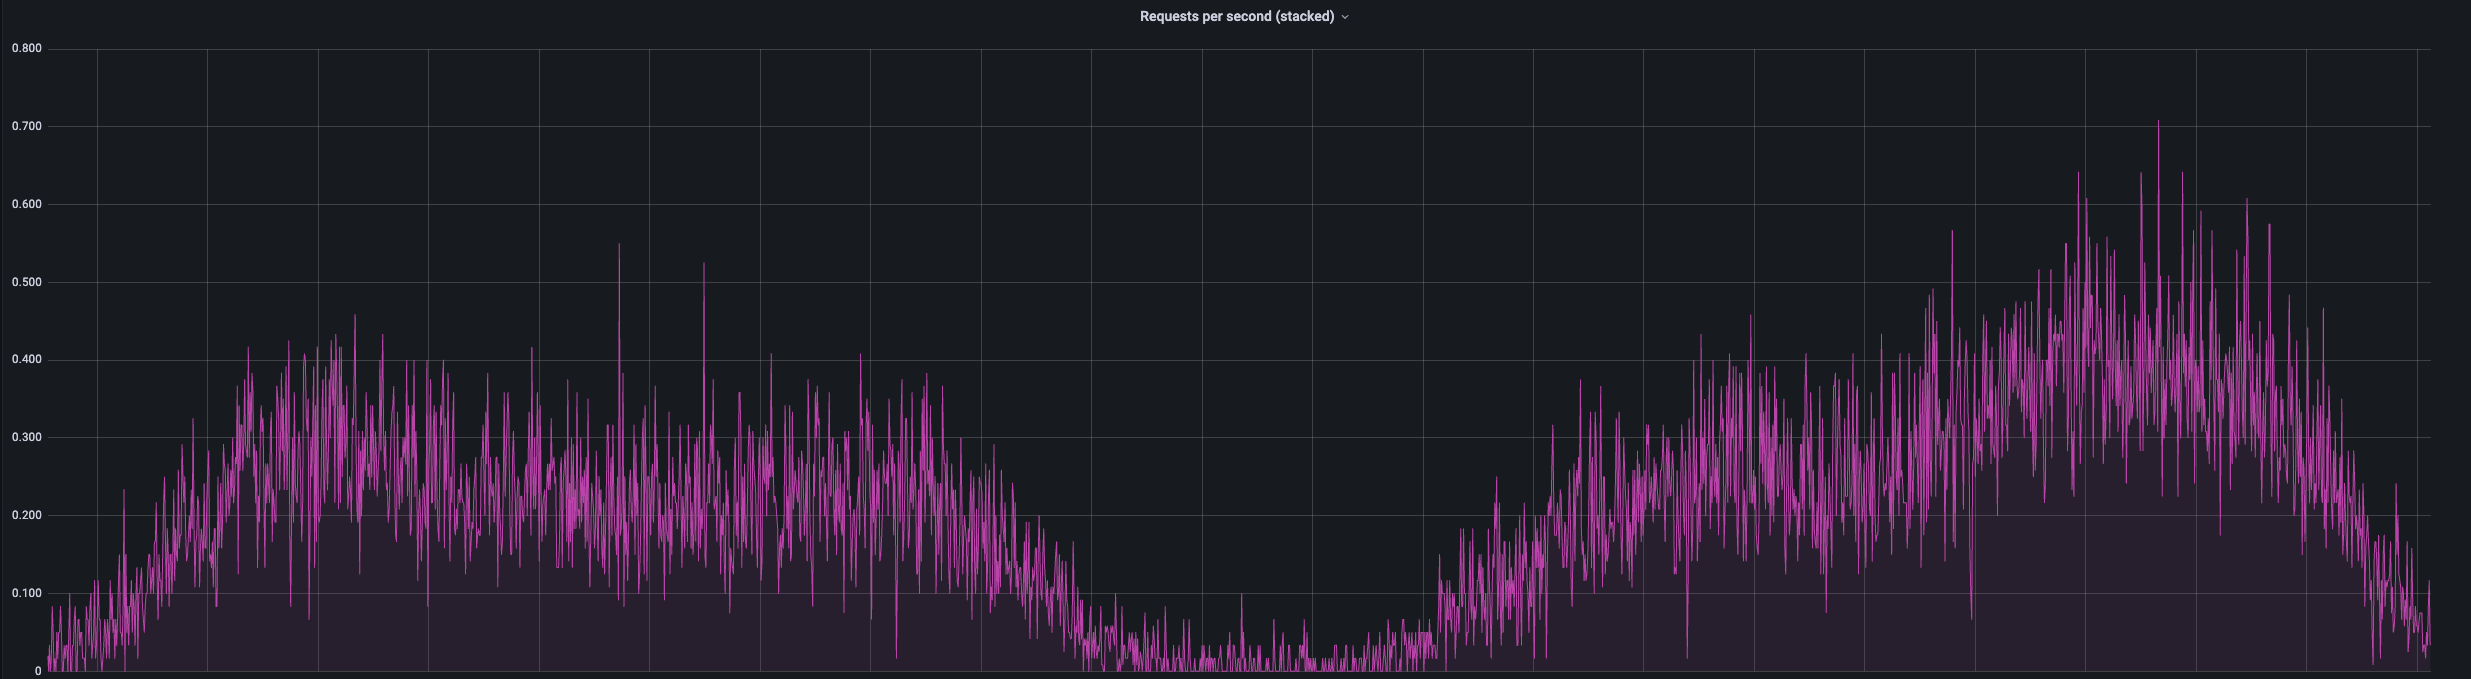
Since the export was launched at night, the procedure had no negative impact on users. The impact of the export operation on the database load (Data I/O percentage) is presented in the graph below. It can be observed that the resource load increased during this operation.
Copying the archived database using AzCopy #
The following script was executed to copy the exported file to the Storage Account:
.\azcopy `
    copy `
    $TargetFile `
"https://$StorageAccountName.blob.core.windows.net/$StorageContainerName/$StorageBlobName$SAS" `
    --recursive `
    --overwrite=true `
    --blob-type=BlockBlob `
    --put-md5 `
    --log-level=info `
    --block-blob-tier=archive `
The process went quickly. Copying the 100GB file took only a few minutes, thanks to the high network throughput. It is worth noting that the archive tier is set immediately.
Conducting a SHRINK operation #
The SHRINK operation is, unfortunately, required to downscale the Azure SQL database. It took several hours to complete. WAIT_AT_LOW_PRIORITY was used to reduce the impact of this operation on the database users.
DBCC SHRINKDATABASE ([DB_NAME]) WITH WAIT_AT_LOW_PRIORITY
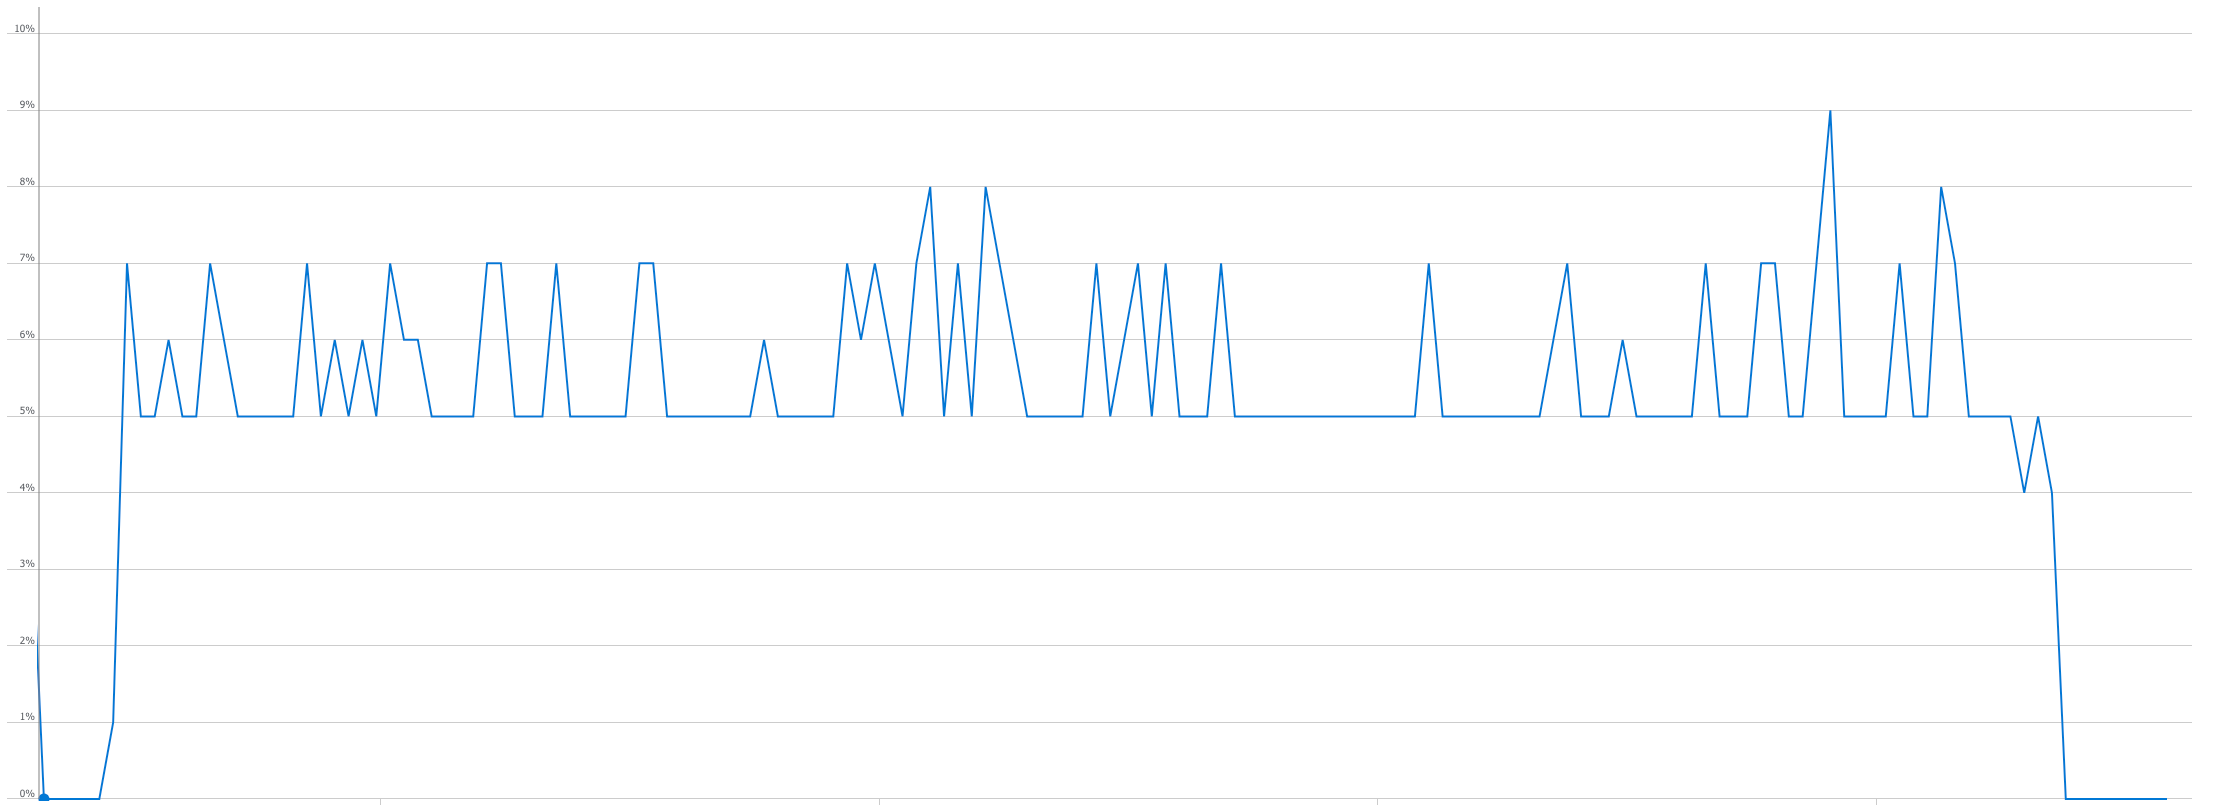
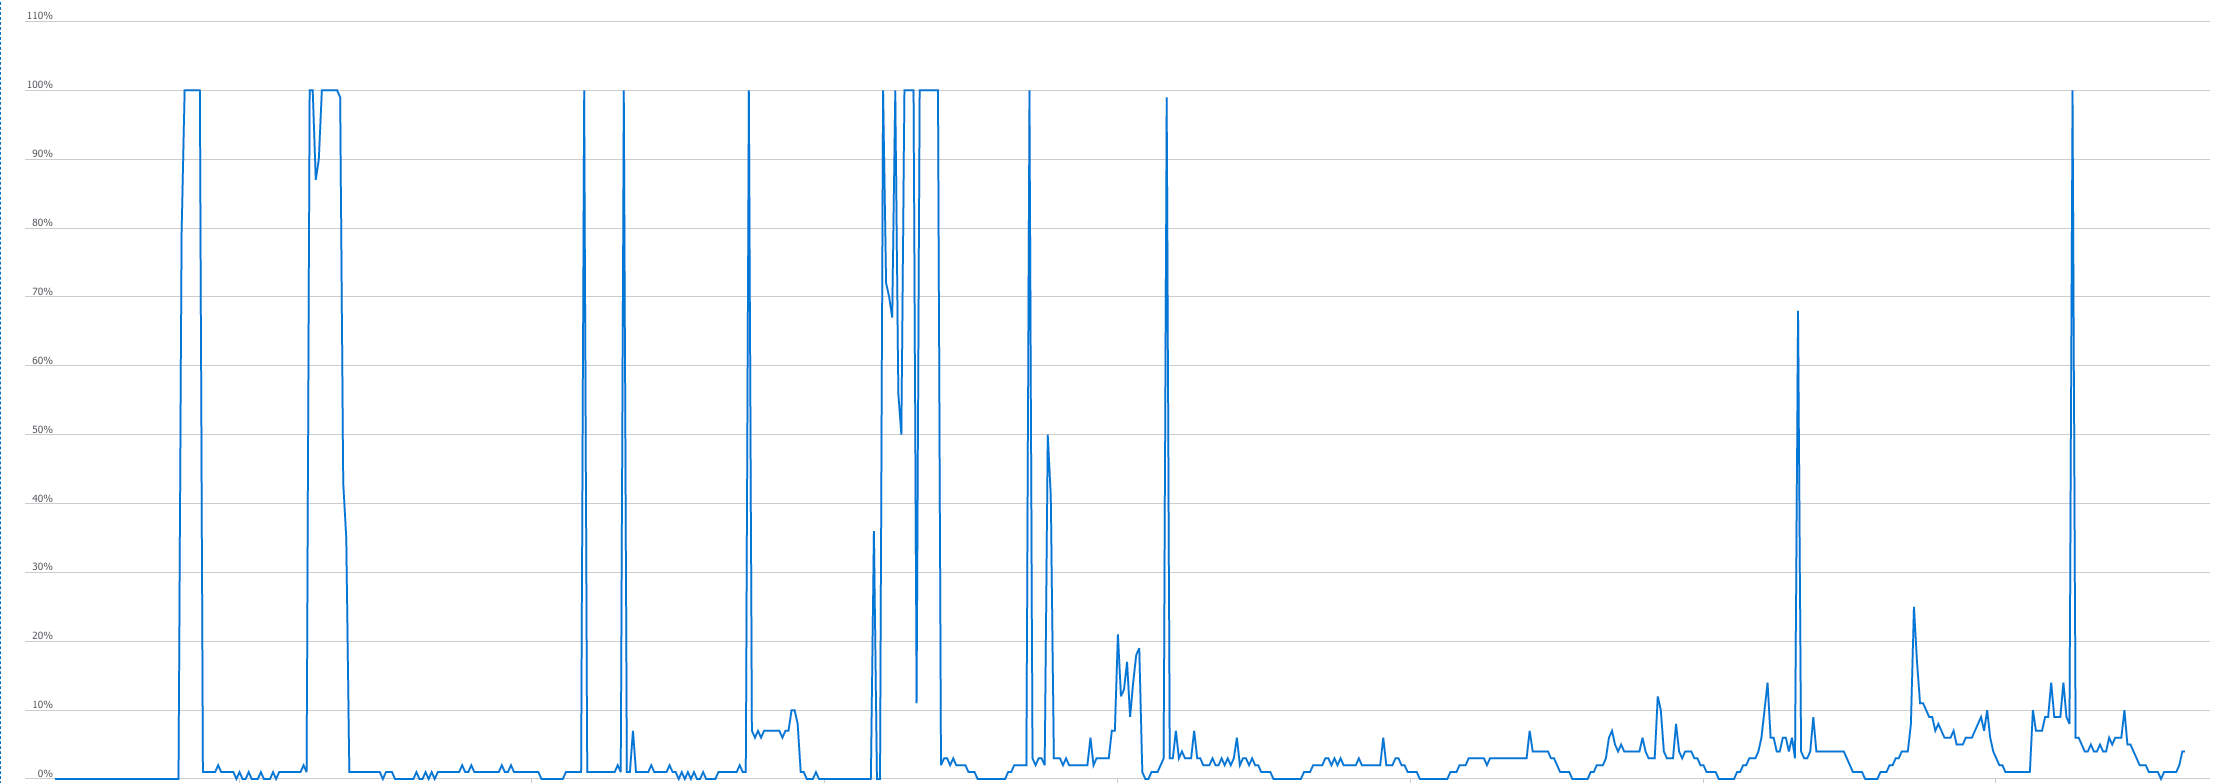
The performance chart (Data IO) during the above operation looked as follows:
We observed a slight increase in Data IO operations during the SHRINK operation.
Performance analysis and index rebuild #
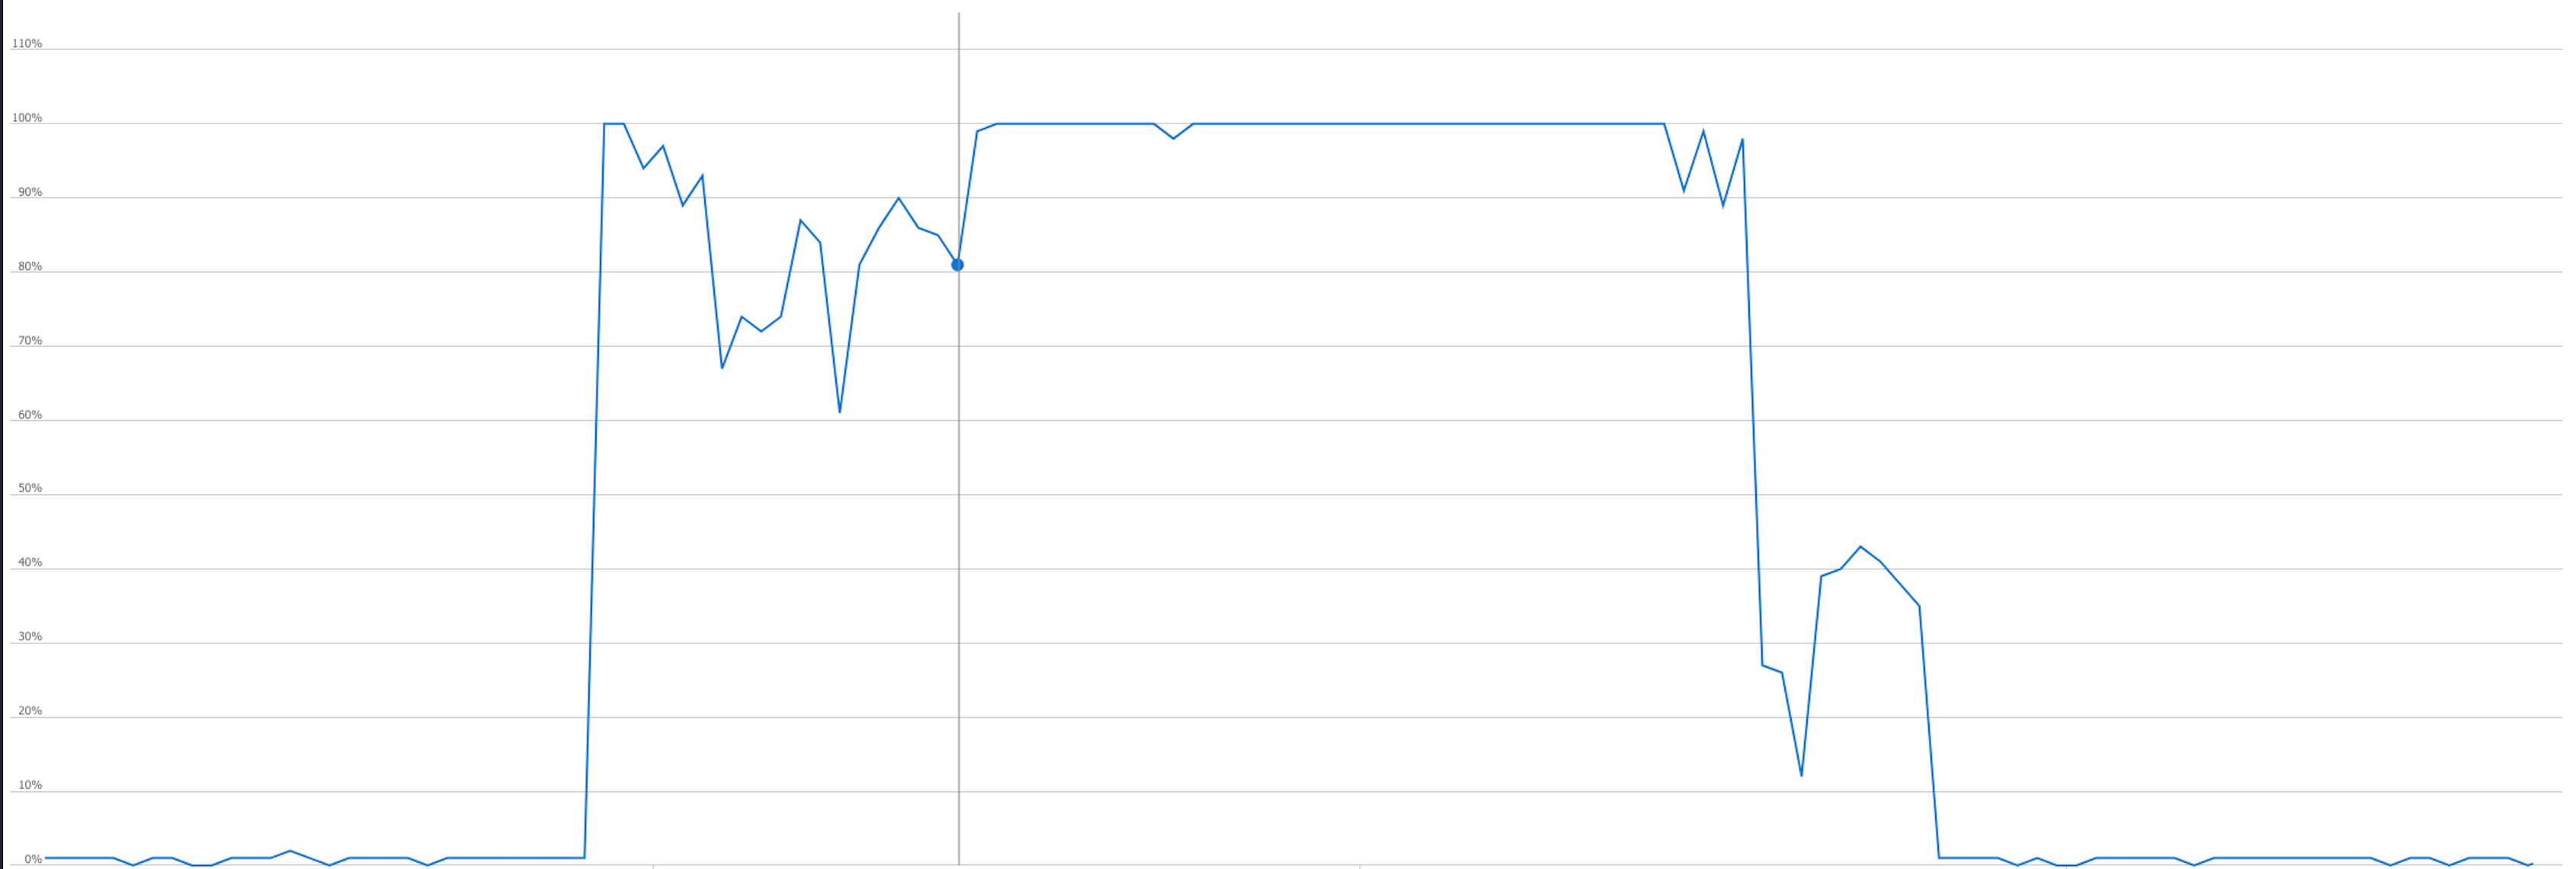
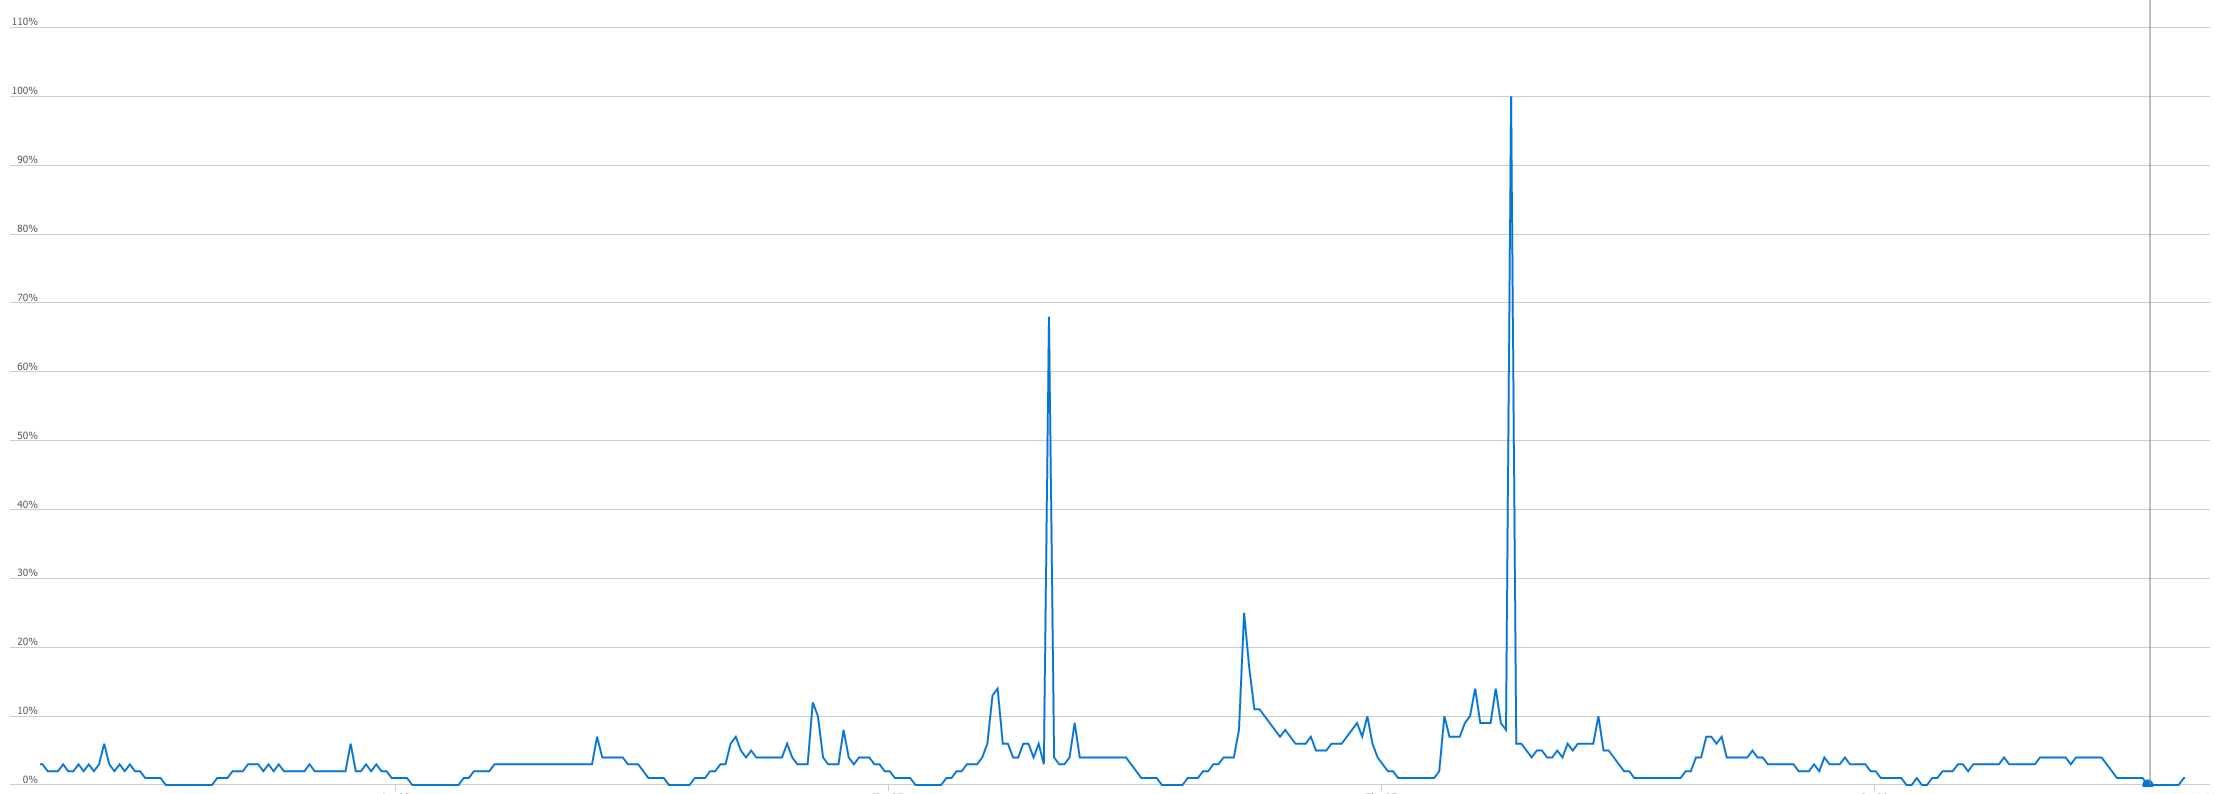
This step appeared quite unexpectedly in our procedure. After performing the SHRINK operation and successfully lowering the parameters of the machine responsible for the database, we began to observe the impact of our operations on performance.
To our concern, we observed a noticeable performance regression. Endpoints that use the database on which we performed SHRINK operation showed abnormally increased response times.
The database load chart also did not look encouraging, with frequent peaks during query execution.
Attempts to scale the machine did not bring spectacular results and only increased costs (considering that our goal was to lower them, it was not an optimal solution).
As it turned out, the culprit was extraordinarily high index fragmentation. The result of the SHRINK operation was an increase in the mentioned fragmentation to almost >90% for practically all existing indexes. This forced us to consider rebuilding all of them.
Even Microsoft recommends rebuilding indexes in their documentation here:
Data that is moved to shrink a file can be scattered to any available location in the file. This causes index fragmentation and can slow the performance of queries that search a range of the index. To eliminate the fragmentation, consider rebuilding the indexes on the file after shrinking.
We decided to proceed with the above-mentioned index rebuild process. Here, we also applied possible optimizations to avoid negative consequences related to the availability of our services. The ONLINE option is particularly noteworthy, as it ensures that existing indexes and tables will not be blocked, what is an important issue in the case of continuous operation of our services.
ALTER INDEX ALL ON dbo.TableName REBUILD WITH
(FILLFACTOR = 80, SORT_IN_TEMPDB = ON, STATISTICS_NORECOMPUTE = ON, ONLINE = ON);
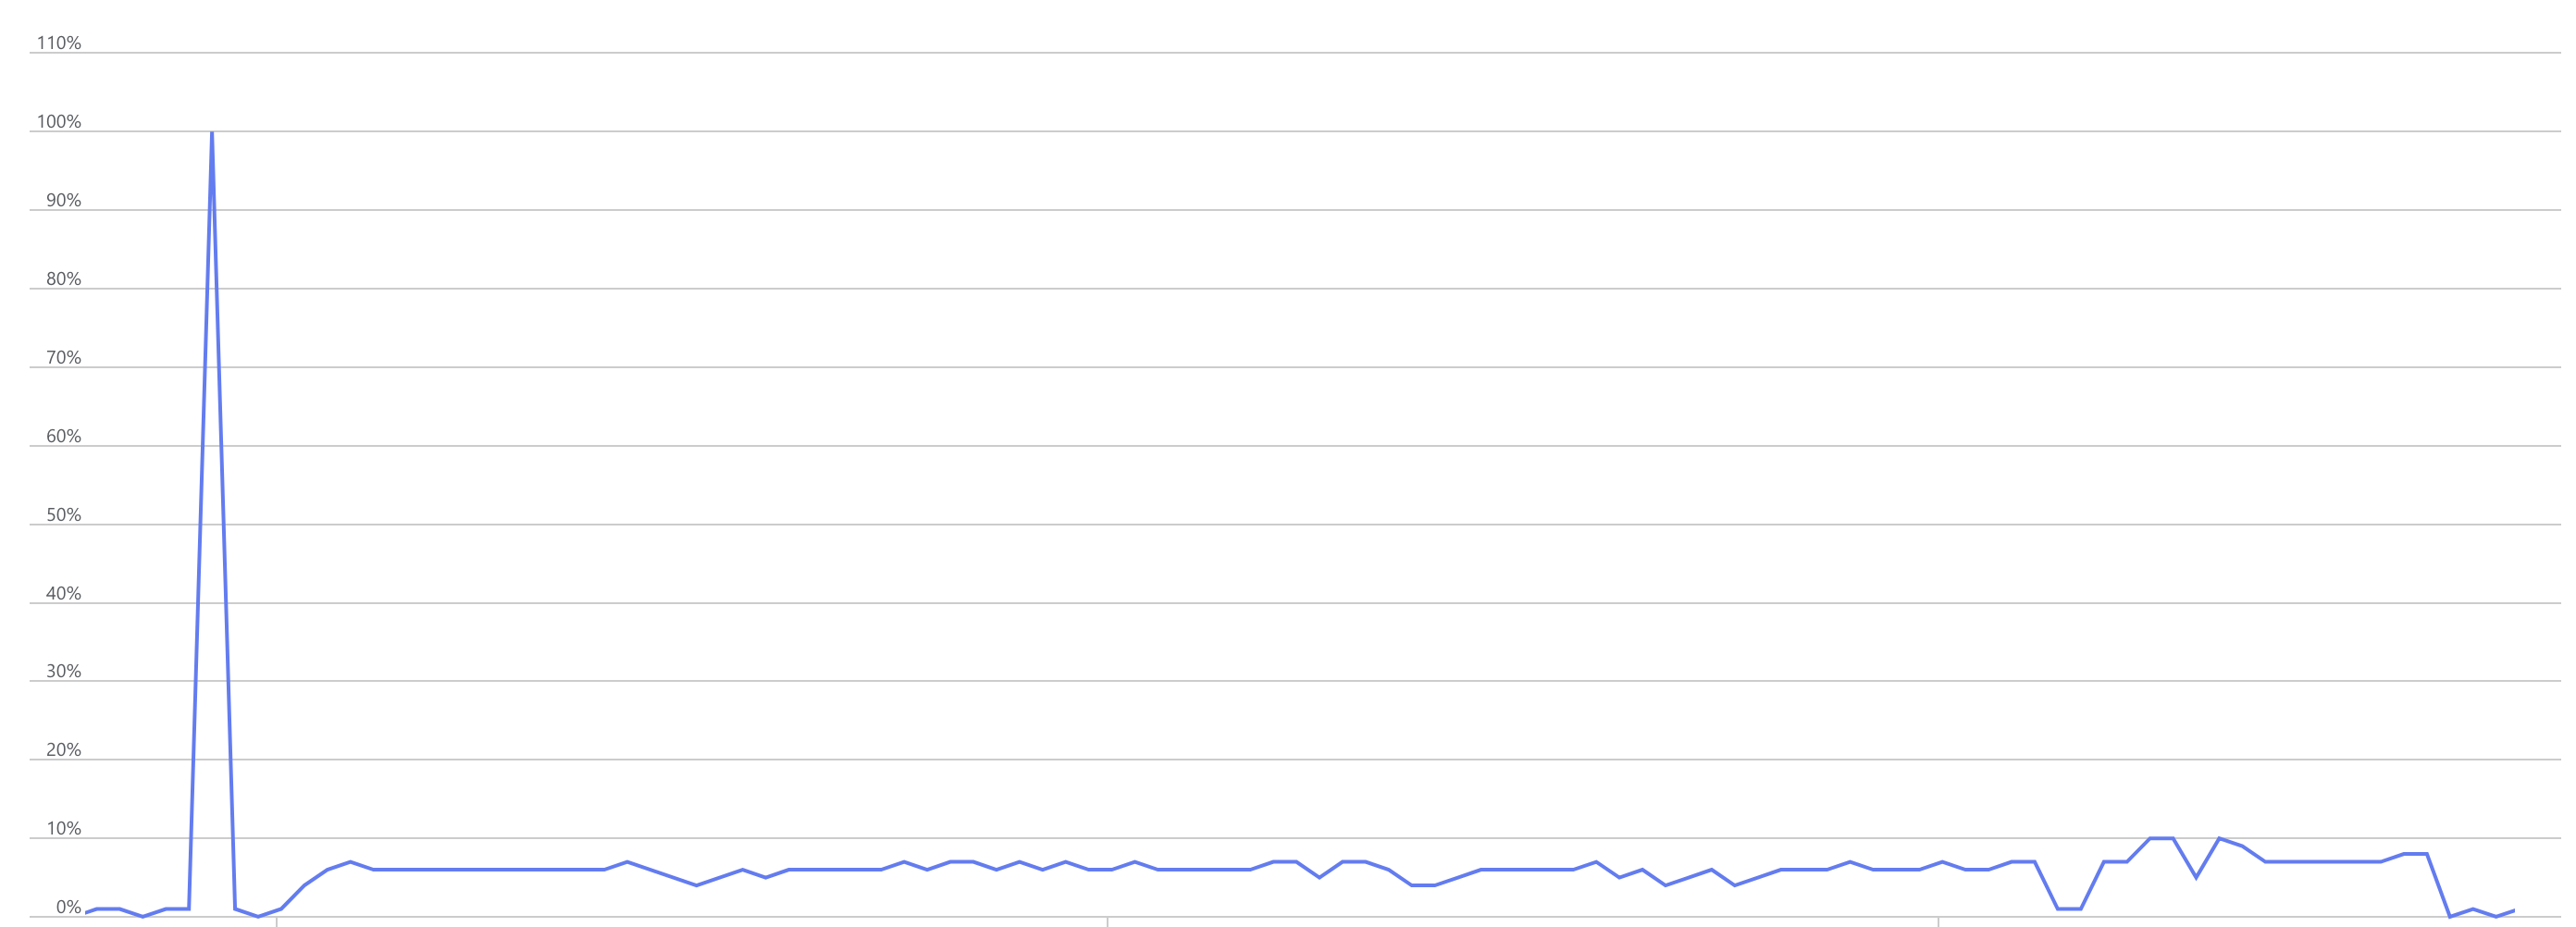
It should also be noted that this can be a time-consuming operation, but as a result of its execution, the indexes returned to the required consistency level, reaching a level of fragmentation close to 0%. The response time and resource consumption charts of the database also returned to the values closer to the initial ones.
Conclusion #
After performing all of the described actions, we achieved a reduction in the size of the database from over 3TB to slightly below 100GB. By lowering the required disk space, we could also significantly reduce the computational resources of the database, generating further serious savings.
Before performing all the operations, the monthly cost of maintaining the database was close to €3000. By switching from a database based on a 12 vCore and 3TB model to a Standard DTU with 100 units and 150GB we managed to cut our monthly spendings to mere €125. After all, our effort paid off.

The above example demonstrates how to greatly reduce infrastructure costs. Of course, the described procedure will apply to specific cases and data characteristics. However, if you have a similar problem, I think it is worth considering this approach.